My First Pipeline with Hugo, GitHub, AWS CodeBuild and AWS S3
In this article I’ll tell you how to create static web site using Hugo and Amazon Web Services.
I will show you how to make content with Hugo, how to keep Hugo code in GitHub, how to build html pages from markdown code using Amazon Free Tier and how to deploy it to AWS S3. By the way, this blog is built by this pipeline.
There are many similar articles like this, this or that. I’ll share some tricks that help you to build your own custom pipeline based on this stack.
1. Create Hugo markdown code
1.1. Install Hugo
Hugo installation process is described here.
I install Hugo via apt-get:
sudo apt-get install hugo
To verify Hugo installation:
hugo version
1.2. Create Hugo project
You can read about Hugo quick start here
But the shortest way to create Hugo web site project is below.
So, let’s create new site:
hugo new site hello_hugo
cd hello_hugo
Install a theme using Git submodule - it allows you to keep only markdown code and config files in GitHub but not a theme content (css, layouts, etc.) For example, you can use a terminal theme
git init
git submodule add  https://github.com/panr/hugo-theme-terminal.git themes/hugo-theme-terminal
You should understand a structure of Hugo web site directory. Default structure is described here.
The site’s content is placed in content directory. The default structure of content directory is described here. BUT every Hugo theme has its own content directory structure and such structure is described on Hugo theme page. You can find an example structure in themes/your_theme_name/exampleSite/content directory.
Moreover, every theme has its own config.toml. Replace config.toml file by config from themes/your_theme_name/exampleSite/config.toml and set up baseURL param in config.toml to your web site address.
Let’s create a page according to theme’s content directory structure. For terminal theme we create a new post:
hugo new posts/my-first-post.md
my-first-post.md file is created with parameter draft: true. This value means that this page would not be build when you call Hugo without additional command lines.
So, you should set draft: false. More information about this param is here. If you want to build page with draft: true you should use Hugo with command lines
Add some content with your favourite text editor to my-first-post.md
Let’s start Hugo server:
hugo server
Now you can enjoy your web pages on http://localhost:1313/.
If you want to access to your Hugo web site not only from localhost you should start Hugo server with this command lines:
hugo server --bind="0.0.0.0" --baseURL="Your_server_name"
More information about Hugo commands here
1.3. Publish your code to your GitHub repository
You can find an instruction how to publish local repository to GitHub on GitHub page
Don’t forget to create token for your account https://github.com/settings/tokens
2 Create S3 buckets and configure static web hosting
The instruction to create a hosting a static web site is placed on Amazon Docs
I previously registred a domain name with https://www.reg.ru/ , created a hosted zone with AWS Route 53. Then I changed a DNS servers list on my domain in reg.ru to Route 53 servers (from Route 53 NS record).
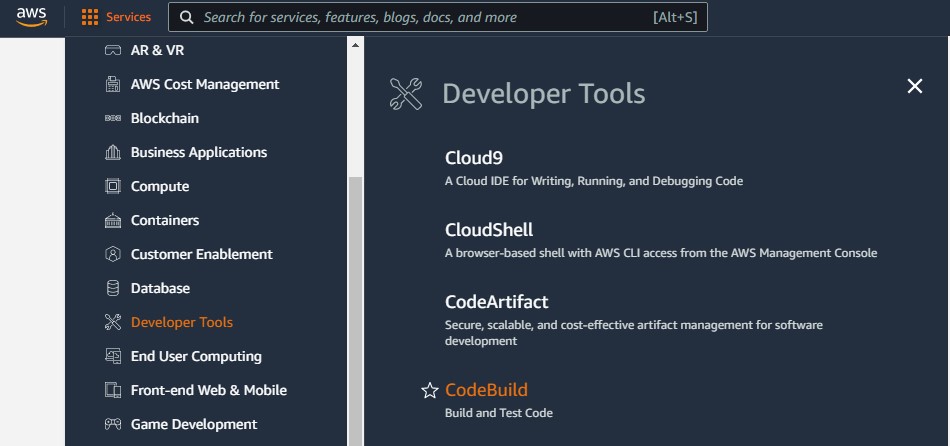
3 Set up AWS CodeBuild
Open your AWS console and select a CodeBuilder
Then create a new build project.
In Project configuration section set your project name
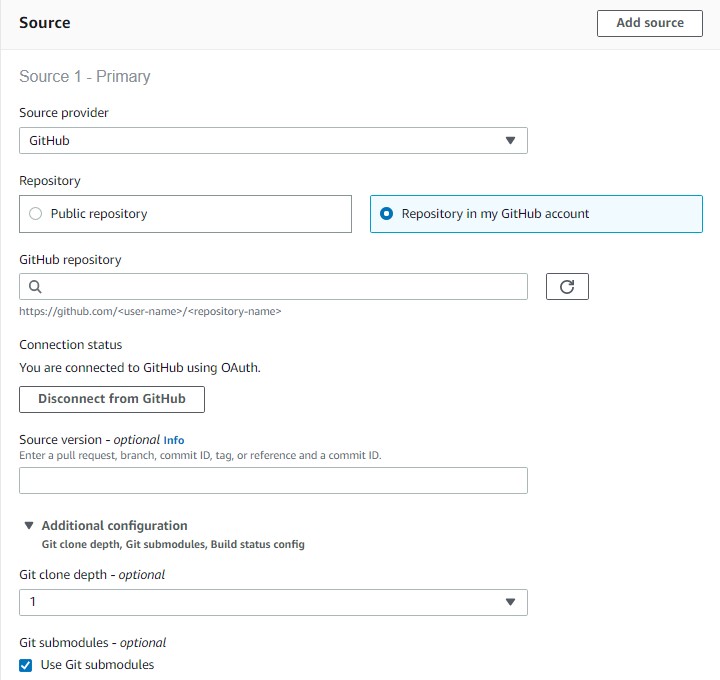
In Source section set:
- Source provider: GitHub
- Connect to your GitHub account and choose your GitHub repository
- Select Git submodules - optional: Use Git submodules
In Environment section set:
- Environment image: Managed image
- Operation system: Ubuntu
- Runtime(s): Standard
- Image: aws/codebuild/standard:5.0
- Image version: Always use the latest image for this runtime version
- Environmet type: Linux
- Service role: New service role
- Additional configuration:
- Timeout: 15 minutes
- Environment variables:
- Name: s3_output Value: your_public_S3_bucket_name
In Buildspec section set:
- Build specifications: Use a buildspec file
And then add buildspec.yml on the root of project near config.toml file.
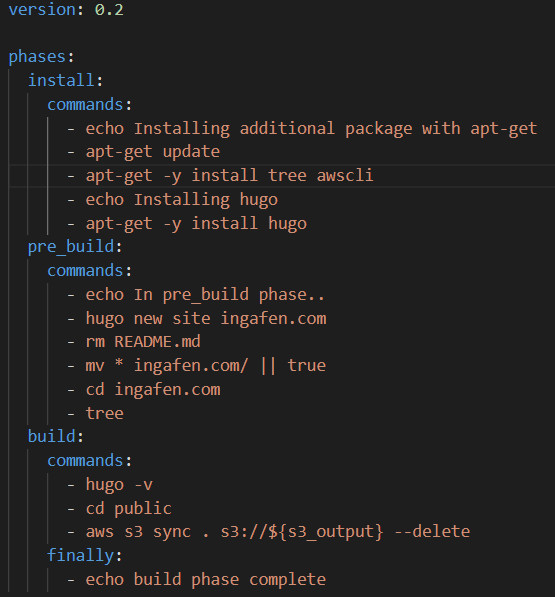
In install phase I install Hugo with snap and awscli with apt-get. Additionaly I install tree packet to debug my build process.
Pre_build phase creates a new hugo site in current directory. But also a themes directory is placed there because of Git submodule. Next two commands remove optional readme file and create a correct hugo project directory structure. Tree command uses to verify a correct project structure.
Build phase runs Hugo. The resulted site Hugo places at public directory. I use syncing of directory and S3 bucket to provide a deletion of unusing files after a rebuilding.
In Artifact section set No artifact because artifacts are deployed by action in previous step.
Now let’s edit a policy in service role.
This role shoul allow:
- Place source code to temporary S3 bucket
- Make sync of public S3 bucket
- Optionaly: place logs to S3 bucket.
I add this code to role with Policy Visual Editor:
{
  "Sid": "AllowSyncToPublicBucket",
  "Effect": "Allow",
  "Action": [
    "s3:PutObject",
    "s3:GetObject",
    "s3:ListBucket",
    "s3:DeleteObject",
    "s3:GetBucketAcl",
    "s3:GetBucketLocation",
    "s3:PutObjectAcl"
    ],
  "Resource": [
    "arn:aws:s3:::public_bucket_name",
    "arn:aws:s3:::public_bucket_name/*"
    ]
}